


The CastVent guide.
Find what to do, where to go and what happens next. Agency-created text and existing Italian contract models are not automatically translated.
Agency privacy notice
Save your agency’s details and contacts in Settings → Agency details first. Then open Agency privacy notice, load the default model and adapt the highlighted sections to your activities. Saving without validation keeps a draft. Validate and save to activate the notice. Changing agency details does not automatically rewrite it; a revised text needs fresh validation.
Find your way around Settings
Settings groups account security, privacy choices and agency configuration. Agency owners can access details, the privacy notice, collaborators, email templates, statuses and subscription options. Contract templates depend on the plan and permissions. Everyday work remains in Casting and Events. Applicants only see their own relevant settings; the super administrator has a separate administration menu.
Password, Authenticator and sessions
Open Account and security with a registered, verified account. To change a password, enter the current one and the new one twice; use at least 12 characters. If Authenticator is enabled, also provide its code. Other sessions are closed after the change. To enable Authenticator, follow the setup and confirm a six-digit code. Save the ten one-use recovery codes securely. Password recovery does not disable the second factor. You can review sessions and close other accesses. Authenticator is optional for ordinary accounts and mandatory for the super administrator; guest links do not have a password to change.
Your agency’s first steps
Complete agency details and prepare and validate its privacy notice. Create a casting call with roles, days, hours and staffing numbers. Open applications, then share the link or code. The trial lasts 30 days from email verification and includes 5 GB, without an automatic charge.
Create and open a casting call
Add the name, client, location and description. Define roles with one or more date ranges, hours and numbers required; indicative pay is optional. Review the code generated from the name and edit it if available. Public casting places it in the catalogue; otherwise share its link privately. Opening and closing applications is separate from public visibility.
Review applications
Open Manage casting and choose cards or table. Select columns and use relevant filters. Open the dossier to view photos, CVs, videos and submitted details. Add useful notes, update statuses and review history with your agency. Changing an internal status does not itself send a message. Agency-uploaded materials remain private to the agency.
Schedule an interview
Use Interviews or open scheduling from the application. Choose the person, date, time, duration and online or in-person format. Provide a location for an in-person meeting. Save to start the invitation workflow. Editing sends an updated invitation with a new link. The interview module must be enabled for the agency.
Conduct an online interview
Choose Open room, review the information and allow camera and microphone access in the browser. Admit the applicant from the waiting room. Use the camera and microphone controls during the call. Interview notes save automatically to the application: check the saving indicator. End interview closes the applicant’s room too. Authorised recording contains the applicant’s video and both voices, starts with both connected and uses agency storage; it can be stopped during the call.
Prepare, send and view a contract
Prepare templates in Settings → Contract templates. Set compensation and the person’s shifts before filling the contract. In the application, open Prepare / edit contract and check details, amounts, IBAN, date and daily assignments. Save a draft, preview, download or send the PDF. The applicant can upload a signed copy, as can the agency. The Contracts section keeps sent and signed versions; signed uploads update the status and applicants cannot delete them. CastVent does not apply an electronic signature. Regenerating a draft from a template replaces manual edits.
Define event staffing requirements
In Manage event and staff, open Event requirements. Enter date, hours, location, role and number of people. Add an optional break and validate requirements copied from the casting positions. Expand a position to see assigned names. A 09:00–19:00 shift with a 12:00–13:00 break remains one shift and the person still covers one position.
Assign and confirm shifts
Open the staff timeline or Shifts and staff. Select an unfilled position or Assign shift, then choose the person. Check dates, role, location and hours; mark Next day for overnight work. Adjust the optional break and review overlaps. You can plan unconfirmed people and add staff outside the casting. Confirm assignments when ready: applicants see their own confirmed work.
Inventory and wardrobe
Add stock items with descriptions, sizes and quantities. In the event wardrobe, select the person and assign a garment or outfit. Review the suggested size before confirming. The people-by-garment matrix shows allocations and shortages. Record handovers, exchanges and returns. You may allocate beyond stock, but the missing quantity is flagged rather than treated as available.
A4 editor: images and template fields
Use the contract template editor for fonts, size, bold, italic, underline and alignment, including justified text. Insert page breaks where needed. Add a logo or image, adjust its width and alignment, or click it to replace or remove it. Headers and footers are optional and repeat on pages. Use the available fields for details, IBAN, pay, date and shifts. Gender-sensitive Italian template syntax remains unchanged. Check the filled preview before sending.
Collaborators, permissions and removal
Invite or link a person by email in Settings → Collaborators and permissions. Assign only the activities and casting scope they need. Application management, event editing and contracts are separate permissions; staff planning covers all events. Removing a collaborator ends agency access but preserves their personal account and applications. Owners, active collaborators and pending invitations count towards the user limit. A permission does not unlock a module excluded from the plan.
Choose and renew a plan
The owner opens Settings → Subscription and storage, chooses a plan, term and extras and checks the total with VAT. Use the displayed beneficiary, IBAN and payment reference. Activation follows receipt confirmation. Renewing the same active plan extends from its expiry. There is no automatic charge; expiry suspends new operations while leaving consultation available and does not automatically delete materials.
Add storage and users
Choose no extra storage or one package: 100 GB, 500 GB or 1 TB. It is added to included storage. Agenzia and Pro can add 0–5 users using the slider. Increases are prorated for remaining days and keep the expiry date. Follow the bank transfer instructions; extras activate after receipt confirmation. Applicants do not use agency seats. Reductions apply at renewal. Custom licences require support.
Change your plan or reduce capacity
Review the cost, effective date and allowance before requesting a change. Upgrades charge the difference for remaining days without changing expiry. Downgrades and extra reductions start at renewal. Check used storage, active collaborators and pending invitations against the new limits. If usage is too high, the change stays pending and no automatic deletion is performed.
Statuses, email templates and communications
Agency statuses are shared across its casting calls. Configure names, colours and communication associations in Settings → Statuses and colours. Edit or create email templates in Settings. From an application, open Communications and requests, choose the action and check recipient and text. Confirm sending: an associated status changes after successful delivery to the mail service. An internal status edit is not itself an email.
Request and upload additional materials
Open Additional materials → Request materials in the application. Choose photos, an introduction video or a video in one of the person’s declared languages and add instructions. Sending the request emails the applicant and displays a red notice in their application. Use Upload more materials for agency files. Each party can remove only its own ordinary materials. Agency files stay private and do not become part of the shared profile. The initial five-photo profile limit does not apply to additional photos requested for an application.
Application archive and post-event notes
Open the archive in card or table view to find previous applicants and their counts. Open profile shows details, materials and private agency notes; compensation and contracts belong to the individual application. Current-event post-work notes are below contracts. The history excludes the casting already open; notes for previous events are read-only from that view and opened with their dedicated button. Applicants cannot see agency notes.
My application: status, requests and contract
Open it from your account or personal guest email link. A yellow notice means the application has not been submitted. After submission, review sent information and dated status history. A red notice links to requested uploads; wait for upload confirmation. A green contract notice provides the sent PDF. Upload the signed version in its section. You cannot delete agency files or signed contracts; a new signed upload creates another version. Never share your personal link.
Prepare your applicant profile
Complete required details and professional information. Add photos, a CV and relevant introduction videos, including in your declared languages. Wait for upload completion: each completed file is saved. Keep contacts, sizes, languages and materials current. Profile updates also update linked applications; private agency notes are not part of your shared profile.
Apply for a casting call
Read the role, location, dates, hours and requirements. Choose Apply, then sign in or continue without registration. Guests receive a personal email link. Complete the required details and materials, read the agency’s privacy notice and submit. Later registration with the same verified email can recover the profile and applications. Saving a draft is not submitting an application.
Attend an interview
Check the agency, casting, date, time and meeting type. For an online interview, use Open room from the latest email link or your portal, including on mobile. Read the information and make the separate recording choice. Allow camera and microphone access and wait for admission. You may participate without recording and can stop it during the call. Use the latest link if the appointment changes.
Privacy and support
Read the applicant and agency notices from the app footer. Manage optional marketing choices in Settings → Privacy and consents. Send personal-data requests to info@castvent.it, including account and casting details where relevant. For technical help contact support@castvent.it and describe the page and error without sending passwords. Interview recording is separate from marketing consent.
No matching topic. Try another word or contact support@castvent.it.
See CastVent in action
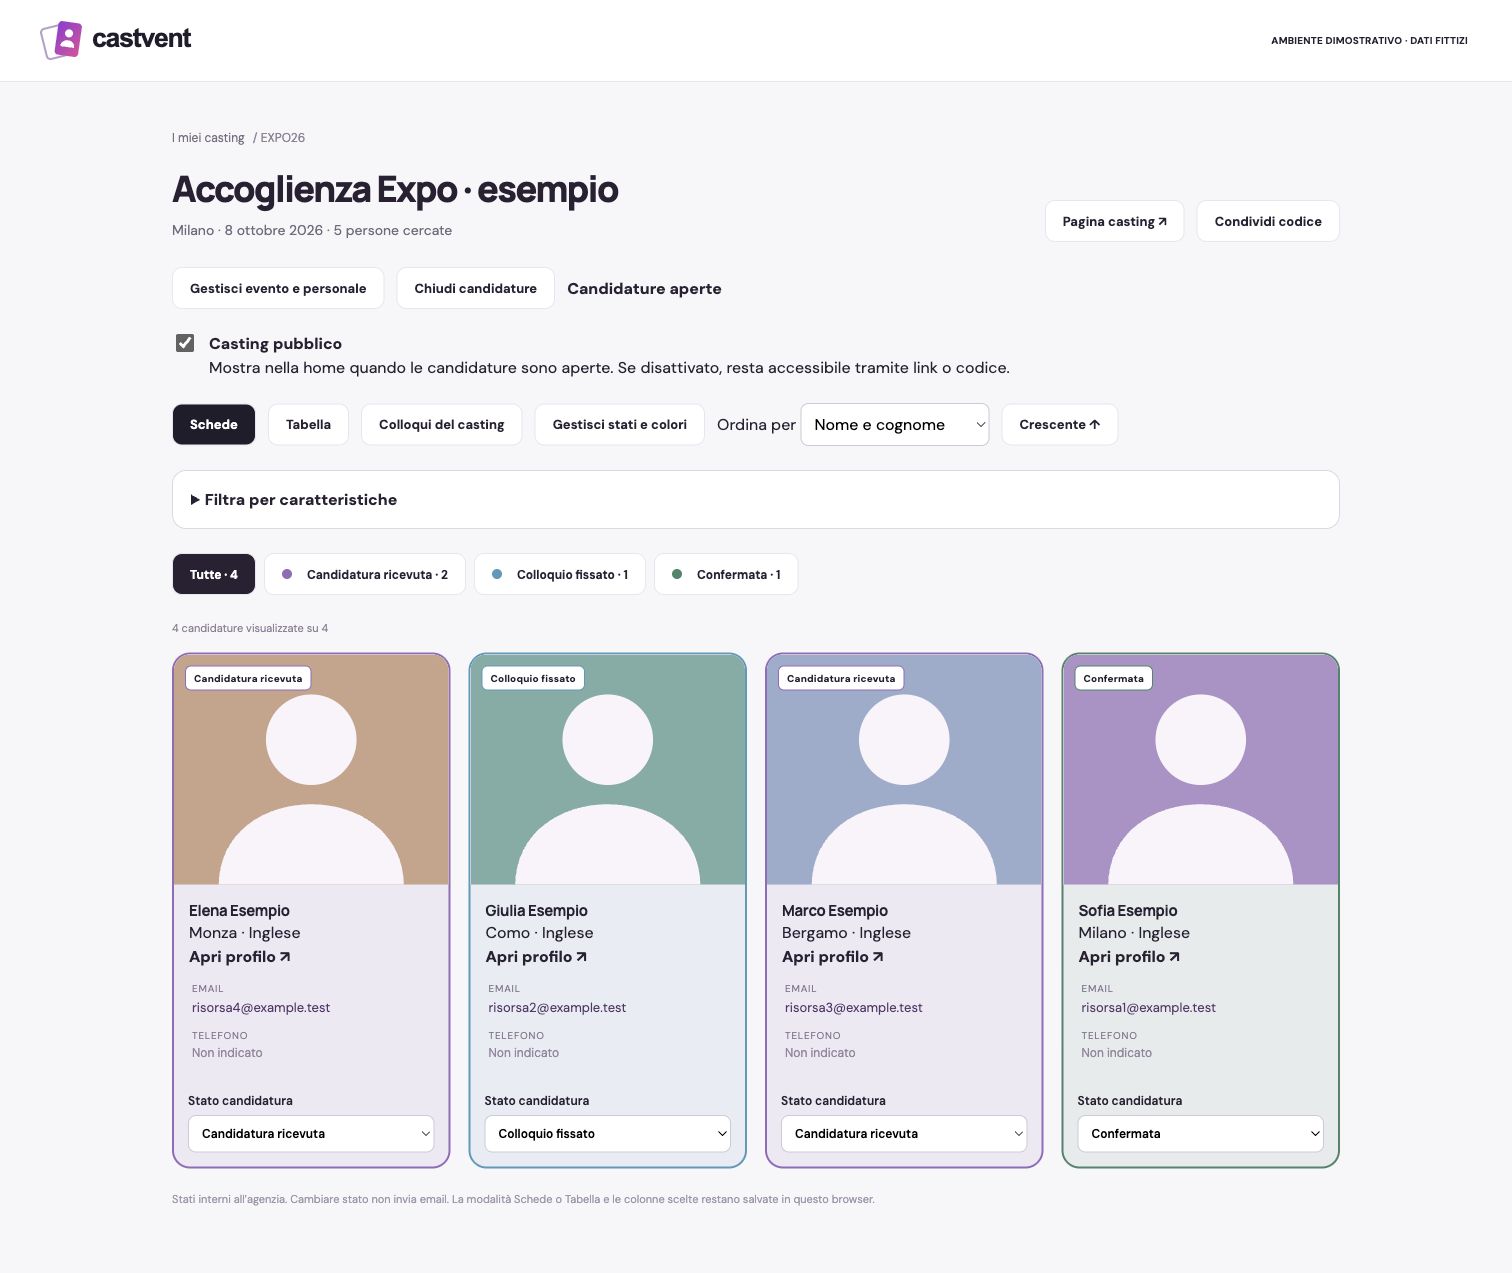
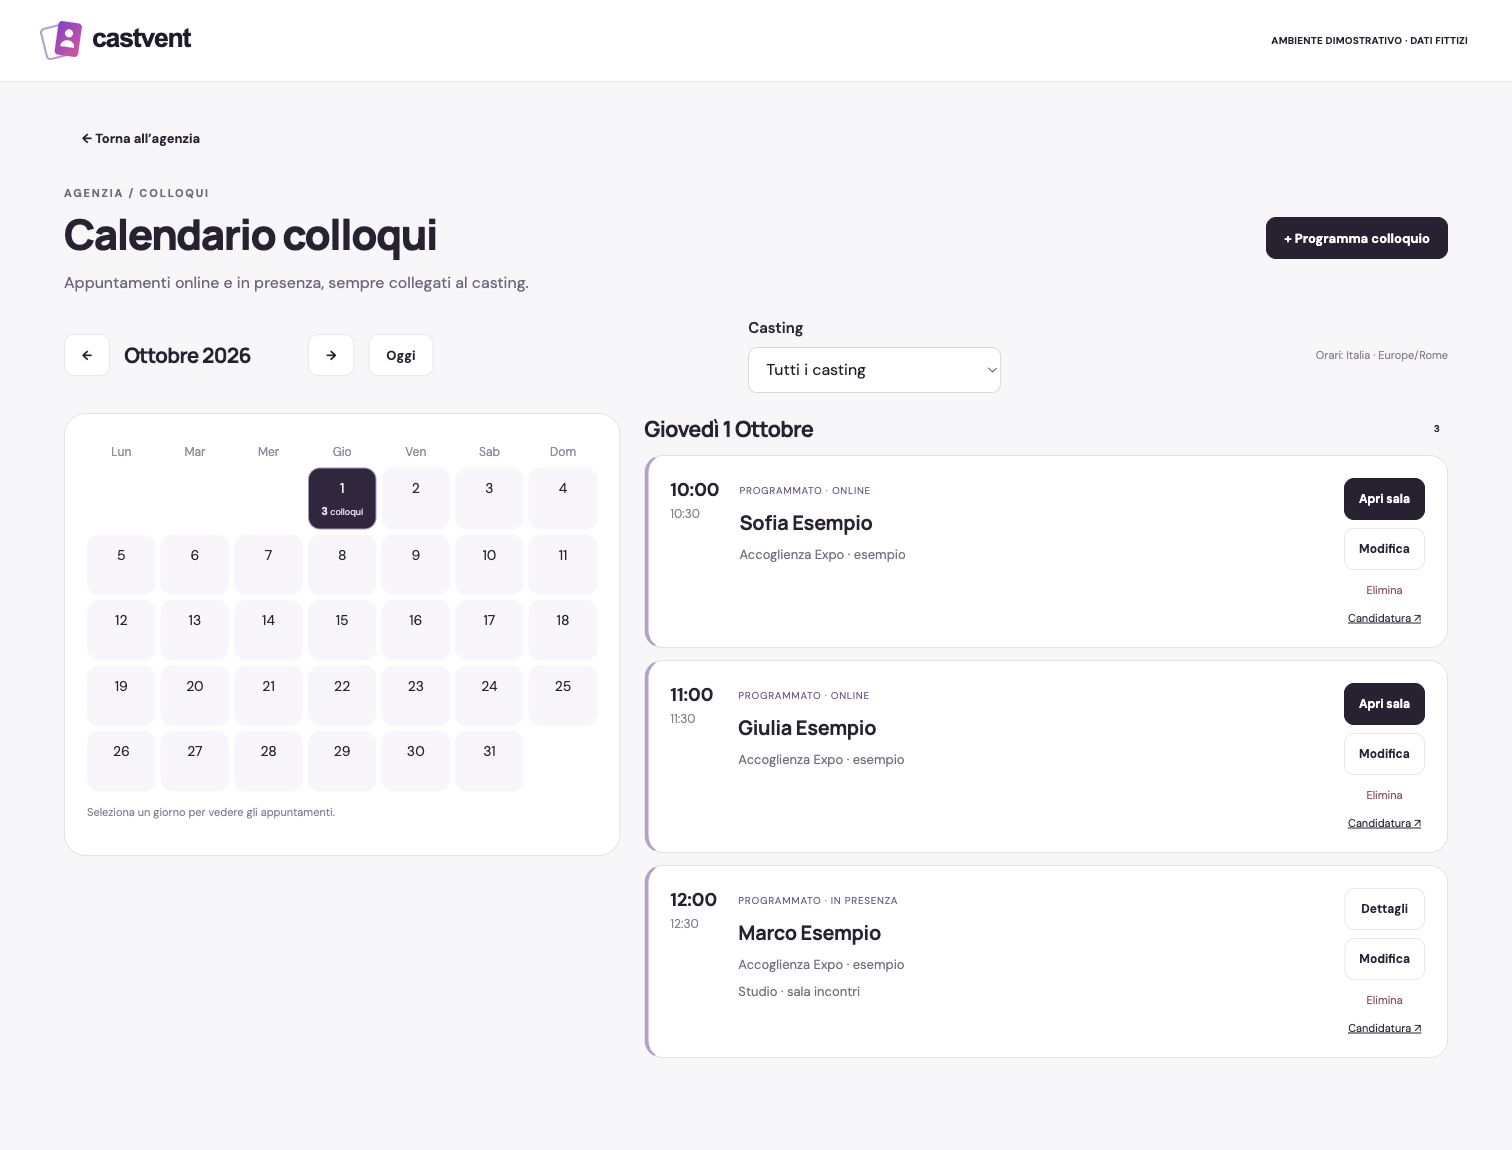
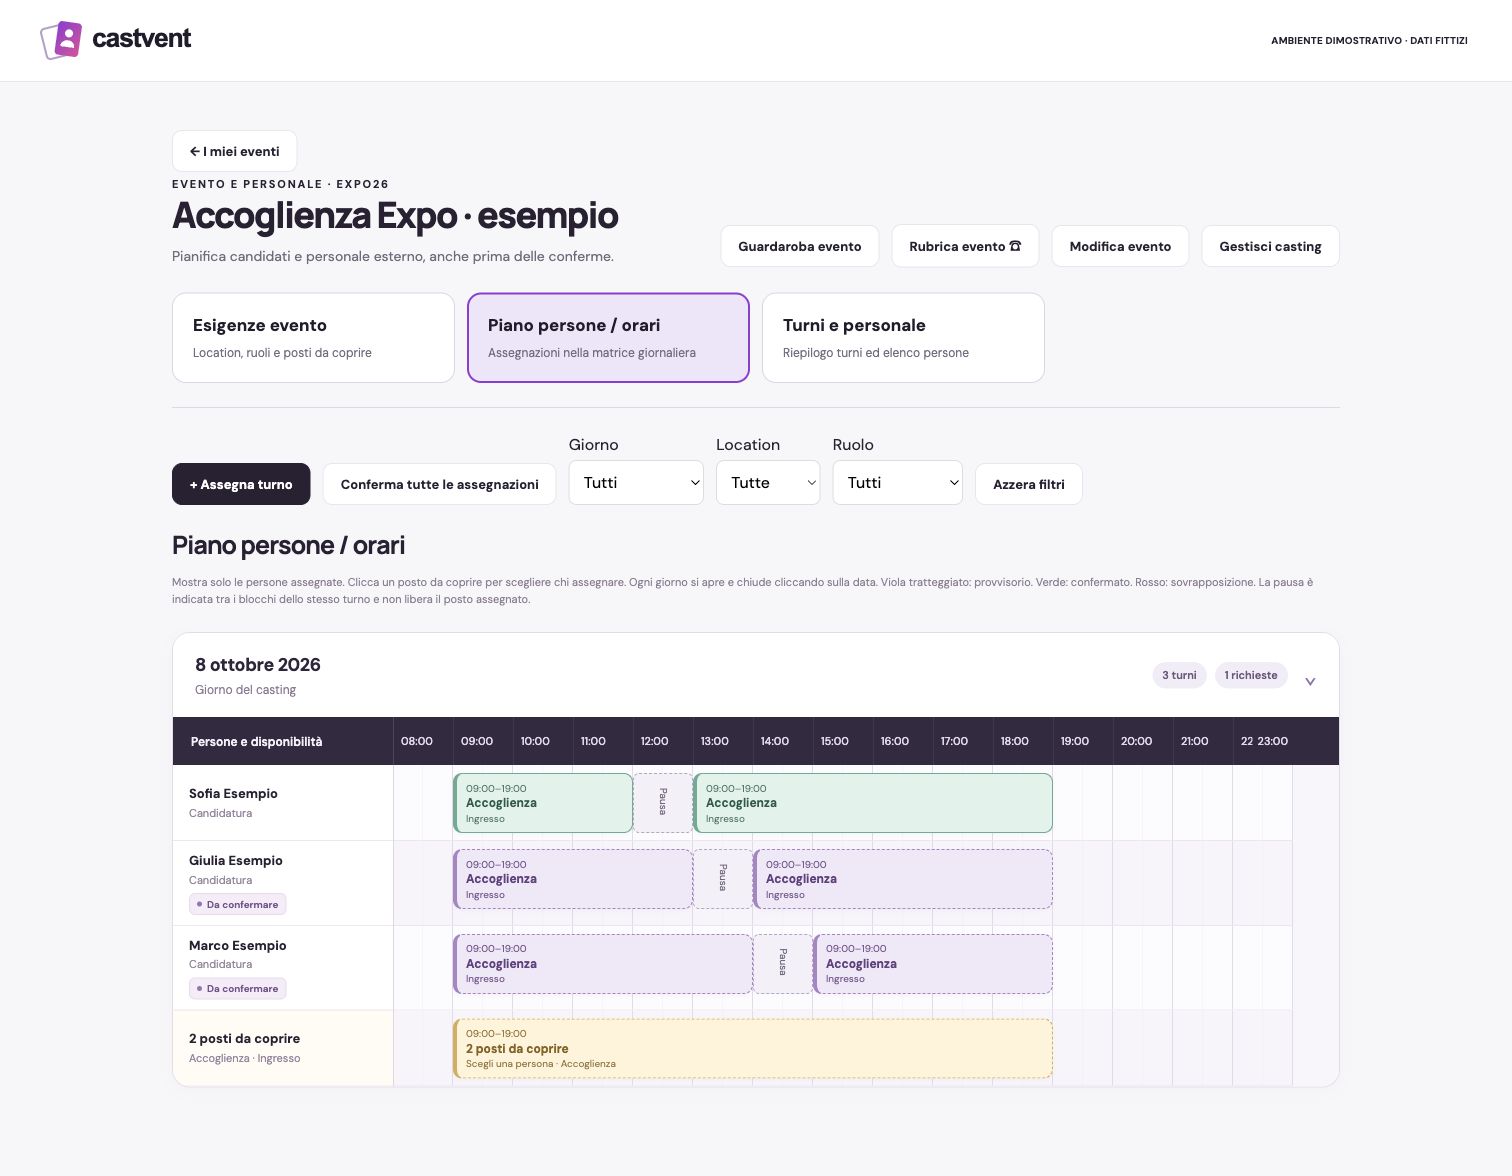
Demonstration interface in Italian. Events, people and materials are fictional; profile images are illustrative.
People, paperwork and schedules. In one place.
Try CastVent free for 30 days. No card required. No automatic charge.
The current service uses Italian tax and administrative rules. Choosing English or French changes the language, not the tax regime or the applicable contract model.